PREVENTION IS BETTER THAN CURE, BUT A LATE START IS BETTER THAN NEVER
You can apply loads of sealant, but the real difference is made by the grade of asphalt that had been used to build the parking lot. A thick mixture, containing more gravel and stone rather than sand will give a thick concentrate, which will endure the test of time and the repeated heating and cooling cycles throughout the year. Always get the construction done by a reliable company to avoid extra expenses for maintenance. If you did not know this during the construction time, keep this in mind when working on your next asphalt project or when hiring a contractor for maintenance work. Mid Atlantic Asphalt has four decades of experience in all types of asphalt repair and reconstruction works, so the following tips have been approved by the experts.WHAT TO LOOK OUT FOR?
The heat can extensively damage asphalted surfaces. However, this does not happen overnight. Here are some signs that indicate poor construction or the need for a sealant application:- Chunks of asphalt coming loose from the parking lot. It might look like debris but it’s the parking lot coming apart.
- Asphalt might warp or take on different shapes. It is highly possible for asphalt to swell up and create major inhibitions in the parking lot.
- Asphalt might spread to the corners and thin out over time. This is because the tar in the mixture heats up and starts melting under high temperatures.
TYPES OF SEALANTS THAT ARE AVAILABLE
 The type of sealant that needs to be used depends on the extensiveness of the damage. There might be the need for the entire surface to be coated with a new layer of asphalt. Here are some sealants which are available on the market:
Seal Coat – A seal coat possesses anti-oxidation additives, which act as a guard against the natural elements, which includes heat from the sun and the moisture in the air. If you live in a relatively rainy area of the United States, your asphalted property might incur more damage than the drier states, which receive less rain per year. This coating slows down the aging process of asphalt, keeping it fresh and solid. This is an ideal solution that is cost-effective and it alleviates the need for frequent maintenance.
Slurry Seal – As the name suggests, this kind of seal is used to fix broken asphalt patches instead of providing a protection layer over it like the seal coat mentioned above. Slurry seal adds aggregates to the broken asphalt to join broken surfaces and make them useable again. It is affordable and usually used for roadways that are already broken or falling apart.
Micro surfacing – This is a major upgrade of a slurry seal which includes a high-grade polymer and residual asphalt content. The fast setting chemicals start working quickly, so after microsurfacing the road is ready for use in about two hours whereas a slurry seal might take more than 24 hours to completely settle.
TRMSS - Tire Rubber Modified Surface Sealer (TRMSS). It is used for expensive infrastructures such as highways and runways and can take a lot of beating before its replaced. This sealant introduces crucial oils, which help increase the life of the pavement. It also prevents the damage from spreading any further. It is highly resilient to weather and oxidation. TRMSS also acts as an asphalt moisturizer.
SEAL COAT YOUR DRIVEWAY – A DIY GUIDE
If you are handy and want to try to apply the asphalt sealant by yourself. Here is a step by step guide that you can follow to save your money: You will need a blower or a power washer, a push broom, good quality crack filler, protective rubber boots, some asphalt sealant, a squeegee and a soft bristled brush.- First, trim the grass and clear the vegetation from the driveway.
- Get rid of any asphalt debris on the driveway with a blower.
- If that does not take away all the dirt, you might want to use a power washer. Asphalt sealers don’t stick to dirty surfaces.
- Take a push broom and get rid of any excess standing water in the cracks. The driveway must be completely dry.
- Use good quality crack filler to fill the cracks if there are any.
- Wear protective rubber boots for this next part.
- Use a soft bristled brush to apply the sealant to the corners of the driveway. Be careful not to get the sealant on surfaces other than the asphalt.
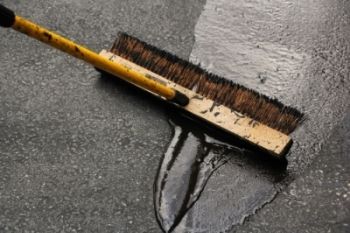
- Pour the sealant onto the driveway and spread it with a back and forth motion by using a squeegee. Make sure to cover the entire driveway and all the cracks.
- Finish off the edges with the soft bristled brush to make it look neat.

